How to Replace Garage Door Rollers
Your garage door moves several times a day. Each time, the rollers guide it smoothly along the track. These small wheels handle a lot of weight and motion. Over time, they wear down. If ignored, they can cause loud noises, uneven movement, or even total failure.
Fixing bad rollers early keeps your door running quietly and safely. It also prevents bigger, costlier issues down the line. In this guide, we’ll walk through the signs of worn rollers and how to replace Garage Door Rollers, step by step.
Signs Your Garage Door Rollers Need Replacement
If your garage door makes loud screeching or grinding sounds, the rollers might be worn. The door may shake or feel hard to open.
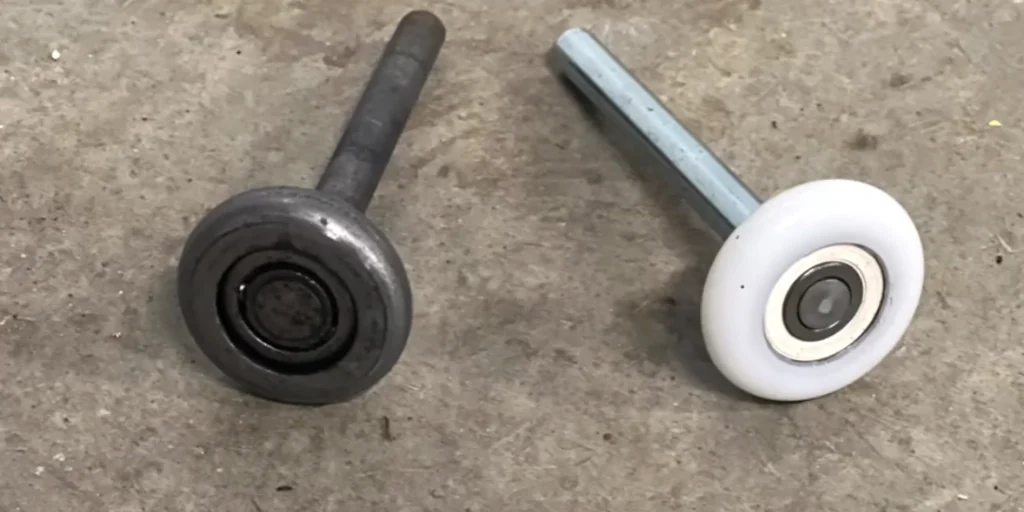
Take a look at the rollers. Cracks, rust, or flat edges mean they’re done. A healthy roller spins freely and looks smooth. If yours look dry, damaged, or loose, it’s time to replace them. Catching these signs early helps avoid track damage and keeps your door running safely.
Types of Garage Door Rollers
Not all rollers are the same. Choosing the right type can improve your door’s performance and cut down on noise.
- Plastic rollers are the cheapest option. They usually come with new doors, but they don’t last long. You might need to replace them every couple of years.
- Steel rollers are strong and durable. They’re great for heavy doors, but they can be noisy without regular lubrication.
- Nylon rollers are quiet and smooth. They cost more upfront, but they last longer and make less noise.
If you’re unsure, nylon rollers with ball bearings offer the best mix of performance, silence, and lifespan. Always check your door’s size and weight before picking a type.
Tools and Materials Needed
Before you start, make sure you have the right tools. Using the proper gear makes the job safer and faster.
Here’s what you’ll need:
- New garage door rollers (make sure they match your current size)
- A wrench or socket set
- Flathead screwdriver
- Clamp or locking pliers
- Ladder
- Safety gloves and eye protection
- Silicone-based lubricant
Having everything ready keeps your work smooth and avoids delays. Safety gear isn’t optional, rollers sit close to parts that carry high tension.
Checkout our guide on Steel vs Wood Garage Doors.
Safety First: Precautions Before You Start
Garage doors are heavy. Some parts, like springs, hold a lot of tension. One wrong move can cause injury. That’s why safety comes first.
Start by disconnecting the garage door opener. This keeps the door from moving unexpectedly while you work. Next, wear gloves and eye protection. You’ll be working near sharp metal parts and moving wheels.
Never touch or loosen the torsion spring. It’s under extreme pressure and can snap without warning. If the rollers near the spring need replacing, leave that part to a professional.
Also, use a sturdy ladder and lock the door in place with a clamp. This prevents it from sliding while you’re removing parts.
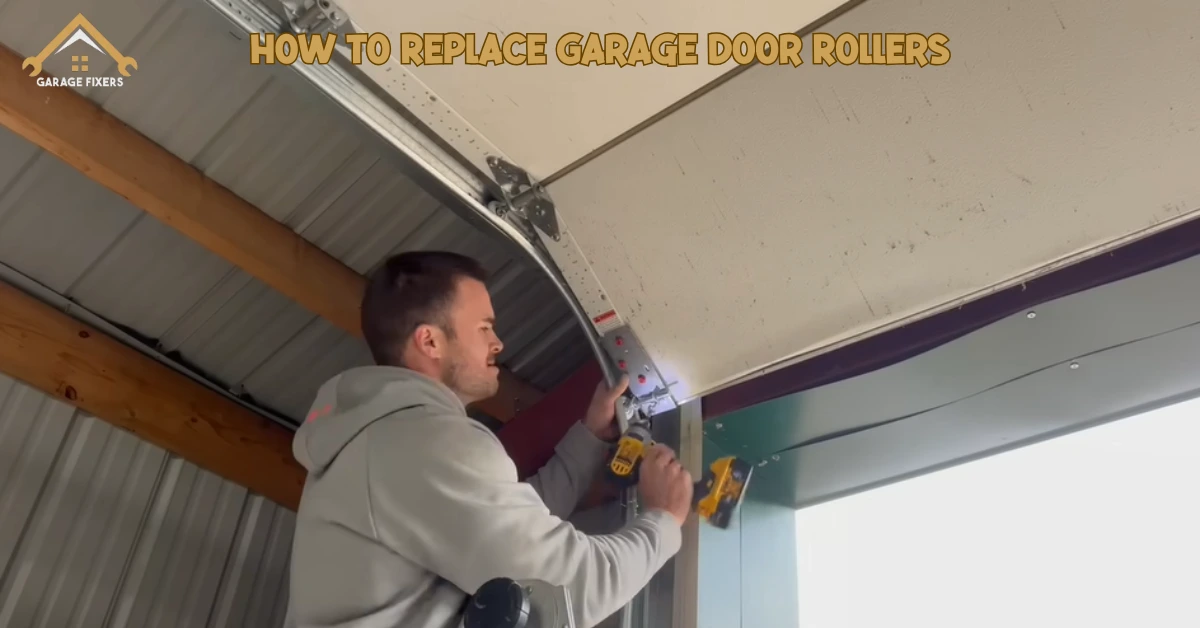
Step-by-Step Guide: How to Replace Garage Door Rollers Yourself
Replacing garage door rollers isn’t too hard if you take your time and follow the right steps. With a few tools and some patience, you can get the job done safely.
- Start by opening the garage door all the way up. This takes pressure off the rollers so they’re easier to remove. Use a clamp to hold the track just below the bottom roller. That keeps the door from sliding while you’re working.
- Begin with the bottom rollers. Grab a wrench and remove the bolts that hold the hinge in place. Once the bolts are out, gently slide the hinge and roller out from the track.
- Now, remove the old roller from the hinge and insert the new one. Give it a spin to make sure it moves freely. Then place the roller back in the track, reattach the hinge, and tighten the bolts.
- Work your way up, replacing the rollers on the lower and middle sections one at a time. Don’t remove more than one roller at once, this keeps the door steady.
Avoid touching the rollers at the top of the door. They’re close to the tension cables and springs, which are dangerous to handle without experience. If the top rollers need work, it’s best to leave that part to a pro.
Special Note: Replacing Rollers on the Top Section
The top rollers are different. They sit near the tension cables and spring system. These parts hold serious force. One mistake can lead to injury.
Even if you’ve handled the lower rollers, don’t risk the top ones. They’re harder to reach, and removing them wrong can throw the whole door off balance.
If your top rollers are worn or broken, call a professional. They have the tools and experience to handle the job safely. It’s not worth risking your fingers or worse for a DIY fix.
When to Call a Garage Door Professional
Some roller jobs are easy to handle on your own. But if the door feels unstable, or if the tracks look bent or out of shape, it’s time to call a pro.
The same goes for broken springs or cables. These parts are under a lot of tension and can cause serious injury. It’s not worth the risk.
If you ever feel unsure during the process, stop and get help. Even if you’ve replaced the rollers but the door still doesn’t move right, a technician can take a look and fix what’s off.
Professionals have the training to spot issues you might miss. Getting help early can prevent bigger, more expensive problems later and it keeps your home safe.
Maintenance Tips to Extend Roller Life
Rollers last longer if you take care of them. It only takes a few easy steps every few months.
First, clean the tracks. Dirt and dust can wear the rollers down fast. Use a damp cloth to wipe inside the tracks. Don’t use grease, just clean them.
Then, spray a silicone-based lubricant on the rollers. This helps them move smoothly. Do this about twice a year. Avoid thick oils like WD-40, which collect dust.
Lastly, check the bolts and hinges. If anything is loose, tighten it. Small fixes like this keep your garage door working quietly and smoothly.
Garage Door Roller Replacement Cost
Garage door rollers usually cost around $5 to $15 each, and most doors need about 8 to 12 of them. So, if you replace them yourself, you might spend around $40 to $100 total. This is cheaper, but you need the right tools and some experience, because removing the rollers can be tricky and unsafe if you don’t know what you’re doing.
If you hire a professional, the total cost is usually between $100 and $250, including both the rollers and the labor. This option is safer, faster, and ensures the door works smoothly without any risk. So, doing it yourself is cheaper, but getting a professional like Garage Fixers is safer and easier.
Garage Door Roller Replacement Cost
If a garage door roller is just loose, noisy or slightly damaged, it might only need a repair instead of a full replacement. A small DIY fix like tightening or lubricating the rollers may cost around $10 to $20 if you already have tools and buy a can of garage door lubricant. But if the roller is bent or worn out, repairing it yourself can be tricky and may not last long.
When a professional repairs the roller, the cost usually ranges from $80 to $150, depending on the condition of the roller and the time needed for the repair. This includes inspection, fixing alignment issues, lubricating moving parts & ensuring the door works smoothly. DIY is cheaper but limited while professional repair gives long lasting results.
Conclusion
Replacing garage door rollers isn’t hard if you follow the right steps and stay safe. It helps your door move smoother, stay quiet, and last longer.
Know when to do it yourself & when to call in a pro. With the right tools and a bit of care, you can handle most roller issues without trouble.
Your garage door works hard every day. A little attention now saves you from big repairs later.