Garage door seals keep your garage safe and comfortable. They close gaps around the door. You can install them yourself. This guide explains the process clearly. Seals block drafts, rain, and snow. They save energy by keeping heat or cool air inside. A tight seal stops bugs and dirt. This protects your garage and home.
Seals come in various types. Bottom seals fit under the door. Weather Stripping lines the sides and top. Threshold seals stick to the floor. Each type has a purpose. Read Till the end to know how to install garage door seals.
Understanding Garage Door Seals
Purpose of Garage Door Seals
Seals make your garage weatherproof and efficient. They stop leaks and save money. You can install them easily.
Protection Against Weather Elements (Rain, Wind, Snow)
Seals block rain from flooding your garage. They stop wind and snow from sneaking in. This keeps your space dry and clean.
Energy Efficiency Benefits
A good seal traps warm or cool air. It lowers heating and cooling bills. Your home stays comfortable year-round.
Preventing Pests and Debris Entry
Seals keep out ants, mice, and leaves. They close tiny gaps pests love. Your garage stays cleaner and safer.
- Overview of garage door seals
- Importance of proper sealing for energy efficiency, weather protection, and pest control
- Brief mention of different types of garage door seals
Types of Garage Door Seals
1.Bottom Seals
Bottom seals fit under the garage door. They block water, wind, and pests. Most slide into a track. Easy to install.
2.Threshold Seals
Threshold seals stick to the garage floor. They create a barrier against rain and debris. Adhesive or screws secure them.
3.Weatherstripping (Side and Top Seals)
Weatherstripping lines the door’s sides and top. It stops drafts and leaks. Nails or adhesive hold it in place.
4.Brush Seals
Brush seals use bristles to close gaps. They work well for uneven surfaces. Great for dusty or windy areas.
5.Vinyl Seals
Vinyl seals are durable and flexible. They resist weather and wear. Perfect for heavy-duty garage doors. Easy to cut.
6.Rubber Seals
Rubber seals are tough and weatherproof. They handle extreme cold or heat. Ideal for bottom or threshold seals.
Tools and Materials Needed
- Measuring Tape
A measuring tape ensures accurate seal length. Measure the door’s edges precisely. It prevents waste and poor fits. - Utility Knife
A utility knife cuts seals cleanly. Sharp blades make precise trims. It’s essential for custom fitting. - Screwdriver
A screwdriver secures seals with screws. Use flathead or Phillips based on hardware. It tightens connections firmly. - Drill (If Needed)
A drill makes holes for screws. Use it for threshold seals or sturdy weatherstripping. Pick the right bit size. - Hammer
A hammer drives nails into weatherstripping. It ensures a tight hold. Tap gently to avoid damage. - Pliers
Pliers bend or grip small parts. They help remove old seals. Useful for tricky installations.
Materials Required
Chosen Garage Door Seal Type
Pick bottom, threshold, or weather stripping seals. Match them to your door’s needs. Check durability for your climate.
Adhesive (If Applicable)
Adhesive bonds threshold seals to the floor. Use weatherproof glue for strong holds. Follow product instructions carefully.
Replacement Screws or Nails
Screws or nails secure seals tightly. Choose rust-resistant ones for longevity. Match size to your door’s frame.
Cleaning Supplies (e.g., Soap, Water, Cloth)
Soap, water, and a cloth clean the door’s edges. Remove dirt for better seal adhesion. Dry thoroughly before installing.
Lubricant (Optional, for Smooth Installation)
Lubricant eases seals into tracks. Use silicone-based spray for smooth sliding. Apply sparingly to avoid mess.
Also Checkout How to maintain a Garage Door.
Preparation Before Installation
Assessing the Garage Door
Checking for Existing Seal Condition
Look at current seals for damage. Check for cracks, tears, or loose fits. Replace worn seals to stop leaks.
Identifying Gaps or Damage
Examine door edges for openings. Spot rust, dents, or warped areas. Fix gaps to keep out weather and pests.
Measuring the Door Dimensions
Measure the door’s width and height. Use a tape measure for accuracy. Write down sizes to buy the right seal.
Choosing the Right Seal
Matching Seal Type to Garage Door Material
Choose seals that fit your door. Rubber seals work for wood doors. Vinyl seals suit metal or aluminum doors.
Considering Climate and Weather Conditions
Select seals for your area’s weather. Use rubber for cold winters. Pick vinyl for hot, rainy climates.
Durability and Maintenance Requirements
Pick seals that last years. Check if they need frequent cleaning. Durable seals save time and money.
Safety Precautions
Wearing Gloves and Safety Glasses
Wear gloves to avoid cuts. Use safety glasses to protect eyes. Sharp tools or debris can cause injury.
Ensuring the Garage Door Is Secure
Lock the door in the open position. Use clamps to hold it steady. A moving door can be dangerous.
Disconnecting Automatic Opener (If Applicable)
Unplug the garage door opener. This prevents unexpected movement. Follow the manual to disconnect safely.
Step-by-Step Installation Guide
Cleaning the Garage Door
- Removing Old Seals
Pry off old seals with pliers. Check for stuck pieces in tracks. Clear all remnants to ensure a smooth surface. - Cleaning Debris and Dirt from Seal Area
Wipe door edges with soap and water. Scrub dirt or grime with a cloth. Clean tracks for better seal adhesion. - Drying the Surface
Dry the door with a clean towel. Ensure no moisture remains. A dry surface helps seals stick properly.
Measuring and Cutting the Seal
Start by measuring the garage door’s bottom, sides, and top with a measuring tape. Write down each length carefully and double-check for accuracy to avoid mistakes. Next, mark the seal with a pencil where it needs to be cut. Use a utility knife to make straight, clean cuts for a snug fit. Test the seal’s length against the door before finalizing. Trim any excess if needed and ensure no gaps remain for a tight, effective seal.
Installing Bottom Seals
Slide the bottom seal into the track under the garage door or snap it firmly into place. Check that it moves smoothly without resistance. If the seal requires adhesive, apply it evenly, or use screws for a stronger hold, tightening them with a screwdriver. Open and close the door slowly to test the fit. Look for dragging or gaps and adjust the seal if it sticks to ensure proper function.
Installing Threshold Seals
Place the threshold seal on the garage floor, aligning it with the door’s edge, and mark its position with chalk for accuracy. Spread adhesive under the seal and press it firmly to the floor, or use screws for extra strength if needed. Close the door to check alignment, ensuring the seal touches evenly with no gaps. Adjust the seal’s position if necessary to create a tight barrier against weather and pests.
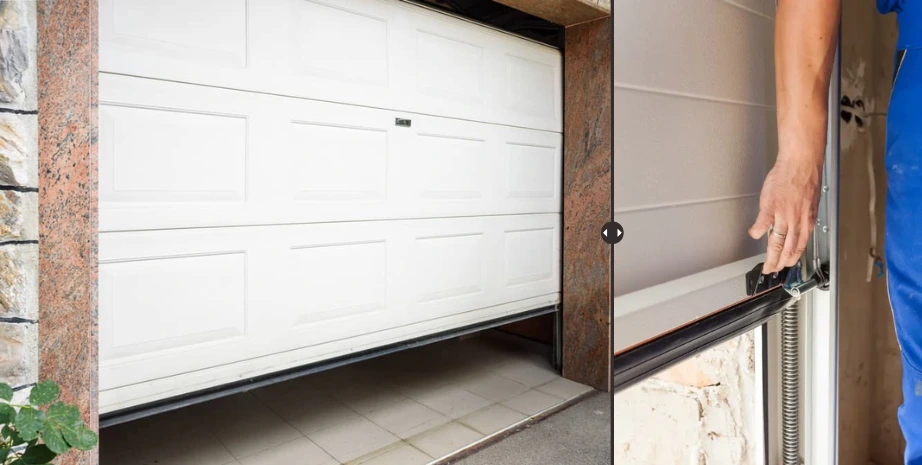
Installing Weather Stripping (Side and Top Seals)
Attach the weather stripping to the sides and top of the door frame, making sure it covers any gaps. Use nails, screws, or glue to hold it in place, depending on the instructions. Close the door to check for any gaps or air leaks. If needed, adjust the seal so it fits tightly and keeps out weather.
Final Adjustments
Open and close the door a few times to make sure it moves smoothly. Cut off any extra seal material for a neat finish. If the door sticks, use a little silicone spray on the moving parts. Adjust the seal if there are any gaps or if it drags, so everything works just right.
Troubleshooting Common Issues
Fix gaps or leaks after installation by repositioning the seal or adding extra adhesive. If the seal won’t stay in place, use stronger screws or clean the surface again. For difficulty closing the door, check for overly tight seals and trim slightly. Tighten loose seals with nails or replace uneven ones for a proper fit.
Maintenance Tips for Garage Door Seals
Additional Considerations
When to Hire a Professional
Hire a pro for complex garage door systems with automatic openers or custom designs. If you lack tools or experience, a professional ensures proper installation. Safety concerns, like heavy doors or electrical risks, also call for expert help like Garage Fixers, who fix everything perfectly.
CALL +14482005489 NOW!
Cost Estimation
Seals and materials cost $20–$100, depending on type and door size. Adhesives or screws add $5–$15. Hiring a professional may cost $100–$300, based on job complexity.
Environmental and Energy Benefits
Seals cut heating and cooling costs by blocking drafts. They lower energy bills by 5–10%. Reducing energy use shrinks your carbon footprint.
Conclusion
Garage door seals help block drafts, bugs, and water. They also save energy and keep your garage safe. You can install them yourself with basic tools. Check them every few months for damage and clean them to keep them working.
Measure carefully before installing for the best fit. Test the door afterward, and replace any broken seals quickly to keep things efficient.